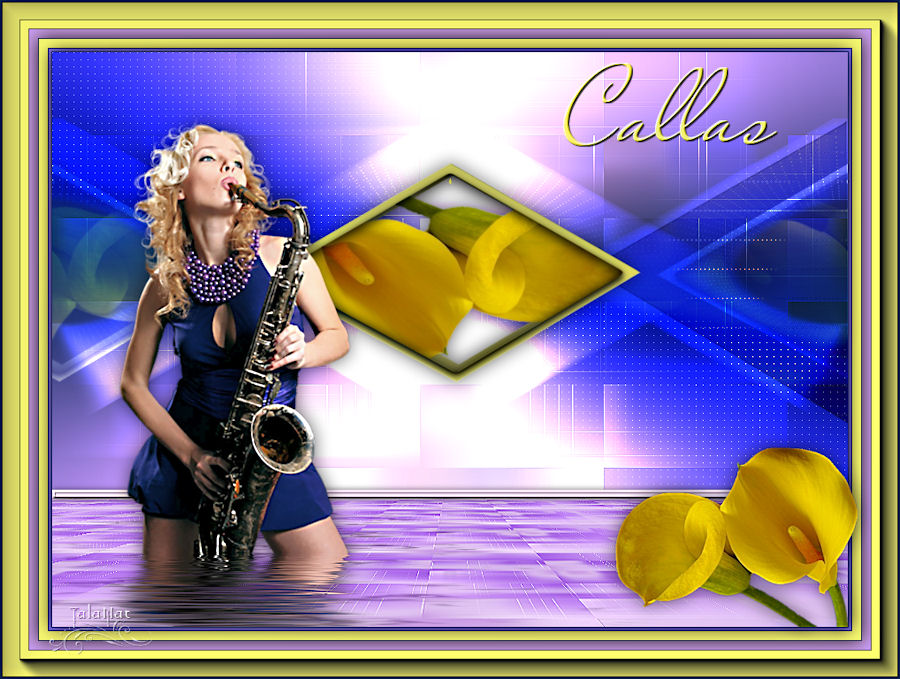
Callas
This tutorial is my property.
Any
resemblance to any other
tutorials or manuals purely accidental.
This tutorial is written TalaNat.
It cannot be used or placed
On other websites, blogs or groups without my
Written permission.
My lessons translate into Italian Pinuccia
Thank you very much, Pinuccia!
My lessons translate into Dutch Angela
Thank you very much, Angela!
This tutorial was made in Corel PSP -12,
but it can be done in other versions.
In the lesson, the materials used:
TalaNat_Ledi-118-20-05-2013.psp
Callas_17-05-2013
Decor_Callas.pspimage
Callas_Text.pspimage
Callas_color palette
Materials
The filters used:
Mehdi-Wavy Lab 1.1.
AP01 Innovation -Lines SilverLining Dotti Grid
Filter Unlimited -Todies –Weaver
LenK Zitah
Alien Skin Eye Candy Impact- Glass , Extrude
MuRas Filter Meister - Perspective Tiling
Flaming Pear –Flood
AAA Foto Frame
Training:
Download materials,
Unzip the file, open the PSP,
Open the tube, make a duplicate (Shift + D). Originals
close.
Double-click presets Alien Skin Eye Candy and they
will be established in folder
Preset Flaming Pear-Flood place in your workpiece
or any other folder.
My color palette
The palette of materials-Set the foreground color-#
e1e599; background # 17230d
.
Open Alfa_Callas.pspimage
Window-Duplicate or press Shift + D. Close the
original.
Step
1
Effects
plug-ins-Mehdi-Wavy Lab 1.1 ...
Radial, 2,0,0
Step 2
Settings - Blur - Gaussian blur radius of 30
Step 3
Elements of choice, download the selected item from
the Alpha channel - Callas _1
Elements of choice-convert the selected item in the
layer
-Effects plug-AP01 Innovation-Lines SilverLining
Dotti Grid - 8, -1, 10, 255, 255, 255
Step 4
Elements of choice-a choice to cancel or Ctrl + D on
your keyboard
Layers palette, blending mode to Soft Light-
Layers – Duplicate
Step 5
Effects, distortion effects are polar coordinates
Rectangular to Polar, repeat
Layers palette, blending mode - the imposition of
Step
6
Layers
duplicate
Image-flip
Layers -
merge with the lower
Step
7
Effects-D
effects, shadow
0,0,60,30
black color # 000000
Step 8
Layers-duplicate
Effects plug-ins-Filter Unlimited-Toadies-Weaver
59. 48,222
Effects-edge-effects to improve
Step
9
Layers-down
order
Set the blend mode of this
layer-lightening-transparency of 65%
Step 10
Stand on the top layer of the converted copy
Pickers-Load selection from the alpha channel, choose
to highlight Callas_2
Edit-clean or press the Delete key on your keyboard
Cancel selection or Ctrl + D on your keyboard
Step11
Effects, distortion effects, denting
intensity of 100
Step 12
Pickers-Load selection from the alpha channel, choose
to highlight Callas_3
Selection elements - invert
Edit - Clean or Delete key on your keyboard
Pickers - deselect
Change the blend mode of this layer to a lighted, the
opacity of about 75%
Step 13
Image - resize 70%
Remove the check mark from the resize all layers
Step 14
Effects-picture effects - continuous mosaic
the corners horizontally - horizontal offset of 0, the
transition 50%
Step 15
Selection elements, download Callas_4
Stand on lower layer
Selection elements - transform selected element in the
layer
Layers - arrange the upper layer
Step 16
Effects plug-LenK Zitah default
5,33,37,47,69,66,57,32
Effects-edge-improving effects
Layers palette - blending mode is the difference - 60%
opacity
Step 17
Effects-D effects, shadow color black # 000000
0,0,60,30
Selection elements, deselect
That's what we have now
Step 18
Selection elements-load selection of the alpha channel
Callas_5
Selection elements-modify-border select selected item
inside 10 with antialiasing
Step 19
Layers, new raster layer 2
Fill with color selection
# f5f26f
Transparency fill 50%
Select – deselect
Step 20
Layers, new raster layer 3
a selection Callas_6
Step 21
Open the image Callas_17-05-2013.pspimage
Edit-copy
Edit-paste into selection
Selection does not cancel!
Step 22
Layers, new raster layer 4
EFFECTS-Alien Skin Eye Candy Impact-Glass
looking for a preset TalaNat_Callas.
cancel selection
Layers duplicate
blending mode - multiply
Layers - merge with the lower
Step 23
Stand on layer outline in a raster-2
Effects plug-Alien Skin Eye Candy Impact-Extrude
preset TalaNat_Callas_Extrude.
Step 24
Get up on the upper layer
Layers-merge with the bottom 2 times
Effects -D effects, shadow 0,0,60,30 black
Step 25
Layers duplicate
Effects, image effects, is continuous mosaic
at the corners ,horizontally -0 50
Step 26
Layers-down order
Set the layer-a lighted, opacity 75%
Step 27
Stand on 3 layer below (copy (2) transformed)
Edit-copy
Step 28
Layers-merge visible
Layers, new raster layer 1
Step 29
Image-resize canvas 900 x 650
On the bottom layer magic wand (the default setting)
select a transparent box
Fill with color highlight # 79a430
Warning! Return the
transparency of the fill is 100%
Step 30
Layers - new raster layer 2
Edit-paste into selected (in the memory of the copied
layer)
Set the blend mode of this layer-imposition of 100%
Layers-merge with the lower
Step 31
Effects plug-ins - MuRas Filter Meister - Perspective
Tiling
The default 80,0,0,100,0,0,100,255
Selection - deselect
Settings-sharpness-considerable enhanced sharpness
Step 32
Rectangle selection tool to activate the user's choice
Layers - new raster layer 2
Fill with color highlight # e1e599
Step 33
Effects-D effects, inner bevel
width of 4, 3,5,10,6; 30.51
the selection cancel
Step 34
Effects-D effects - shadow black # 000000
0.0.60.10
Layers-merge
visible
Step 35
Open the image Decor_Callas.pspimage
Edit - Copy
Edit - paste as a new layer
Step
36
Effects,
image effects, offset 0, -260, transparent
Effects-D
effects - shadow
black, 0, 0,
40, 30
Blending mode to is a hard light
Step 37
Open the image of a girl
TalaNat_Ledi-118-20-05-2013.psp
Edit - Copy
Go to the working paper
Edit-Paste as new layer
Image - resize 60%
uncheck resize all layers
Effects -picture effects -shift
-235.28
Step 38
Effects - plug-ins Flaming Pear-Flood
Click on the little red arrow - locate the folder
preset-Flood settings_Callas.q8r
Warning! If you use your material, the effect of
May be different. Play the top slider plugin Flood
Settings-sharpness-enhanced sharpness
Step 39
Effects-D effects, shadow
0,0,60,30 black
Step 40
Image-add borders 1 peak color # 17230d
Image-add borders 3 peak color # f28c75
Image-add borders 1 peak color # 17230d
Image-add borders 10 peak color # f5f26f
Image-add borders 1 peak color # 17230d
Image-add borders 10 peak color # 79a430
Step 41
Selection elements-select all
Selection elements - modify - to reduce by 25 peak
Effects-D effects - shadow
black 0,0,80,30
selection – deselect
Step 42
Elements of choice-select all
Elements of choice-modify - to reduce by 10
Effects - three-dimensional effects, repeat shadow
Elements of choice, deselect
Image-add borders 1 peak color # 17230d
Open the image Callas_17-05-2013.pspimage
Edit-copy
Go to the working canvas
Edit - paste as a new layer
Step 44
Image - resize 60%
uncheck resize all layers
Image - a coup
Image-Mirror
Move the image in the lower right corner, as on the
model
Step 45
Effects - D effects, shadow
black 0,0,60,30
Settings-sharpness - a significant enhanced sharpness
Step 46
Selection elements-select all
Image-add borders 30pik color # f5f26f
Selection elements, invert
Step 47
Effects plug-ins-AAA Foto Frame
Selection elements – deselect
Step 48
Open the image Callas_Text.pspimage
Edit - Copy
Return to the working canvas
Edit - paste as a new layer
Effects-image effects - offset 250.265
Lower the
opacity to 80%
Step 49
Layers - new raster layer for your signature
Image-add
borders 2 Peak # 17230d
Change the image size to 900 pixels wide
Save your work in jpg format
At the same time we're done.
I hope you enjoyed this tutorial.

Another version

Waiting for
your version
Lesson
written 25.05.2013
TalaNat


Комментариев нет:
Отправить комментарий